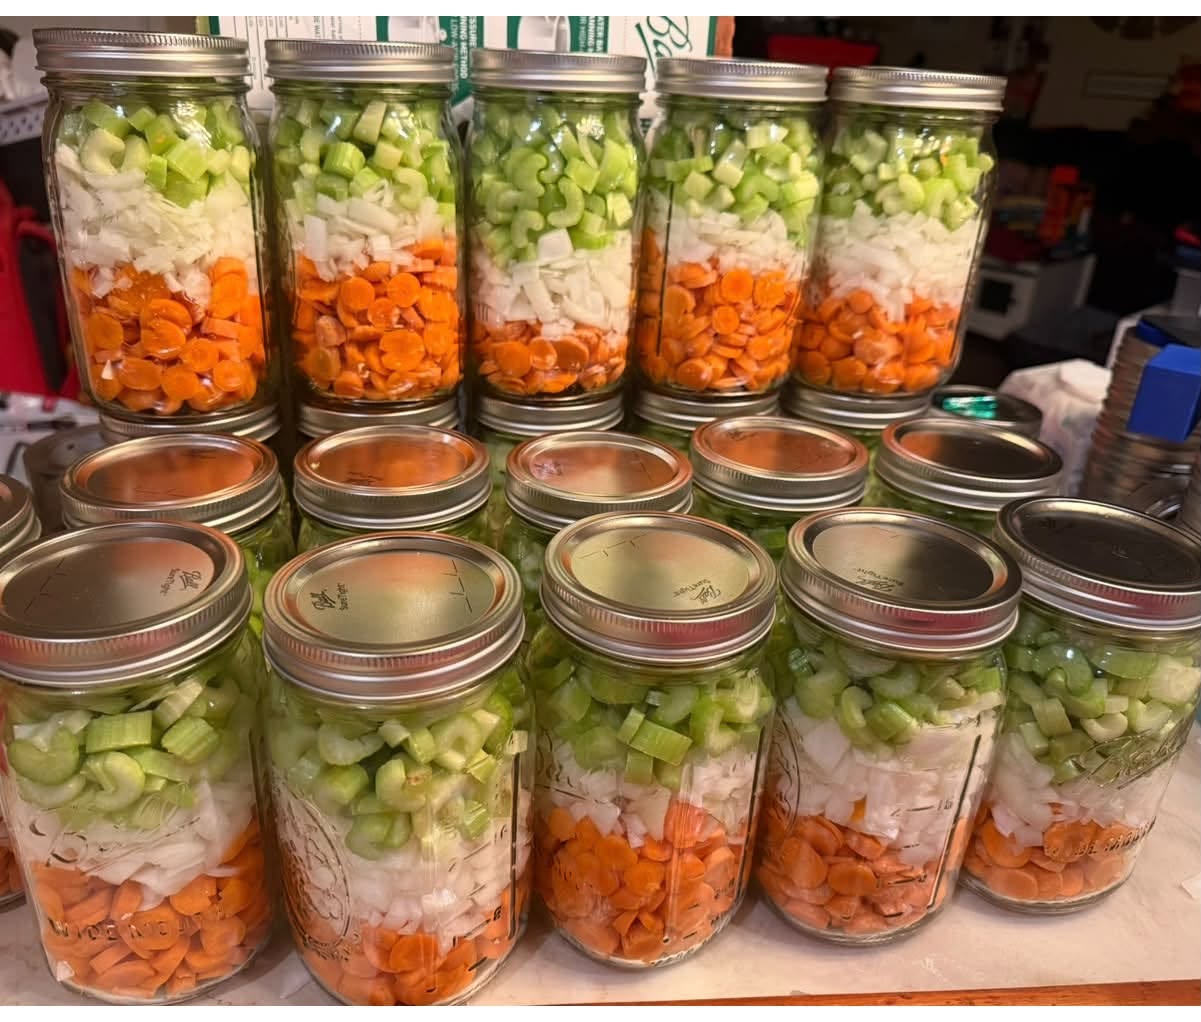
| Metric | Details |
| Prep Time | 35 minutes |
| Processing & Cooking Time | 1 hour 15 minutes (including canner venting and pressurization) |
| Total Time | 1 hour 50 minutes (plus natural depressurization) |
| Skill & Labor Intensity | Moderate (Requires knife skills for uniform dicing and familiarity with operating a dial-gauge or weighted-gauge pressure canner) |
| Heat / Stove Intensity | Medium-High to High (Active boiling for blanching, followed by steady medium heat to maintain 10–11 PSI in the pressure canner) |
| Yield | 7 Pint (500 ml) Jars |
| Shelf Life (“Lasts Until”) | 12 to 18 months when stored in a cool, dark, dry pantry at 50°F–70°F (10°C–21°C) with intact vacuum seals. Once opened, refrigerate and use within 5 to 7 days. |
Equipment Needed
-
Pressure Canner (Must be a true pressure canner capable of holding at least 4 quart jars or 7 pint jars—do not use an electric multicooker/Instant Pot, as they are not tested for safe low-acid canning)
-
7 Pint-Sized Mason Jars (16 oz / 500 ml), inspected for nicks or cracks
-
New Two-Piece Canning Lids and Bands
-
Large Stockpot (for blanching vegetables and keeping canning liquid hot)
-
Canning Funnel, Jar Lifter, Bubble Remover/Plastic Spatula, and Clean Towels
Ingredients
Following the traditional culinary ratio of 2:1:1 by weight ensures balanced flavor in every jar:
-
4 lbs (1.8 kg) Yellow Onions, peeled, root ends trimmed, and diced into uniform ½-inch (1.25 cm) pieces
-
2 lbs (900 g) Carrots, scrubbed, peeled, trimmed, and diced into uniform ½-inch (1.25 cm) cubes
-
2 lbs (900 g) Celery Stalks, washed, trimmed, strings removed if tough, and diced into uniform ½-inch (1.25 cm) pieces
-
8 cups (2 liters) Filtered Water (or unsalted vegetable/chicken broth, though plain water offers maximum versatility across recipes)
-
3 ½ teaspoons Canning & Pickling Salt (optional, ½ teaspoon per pint jar; omit for a completely sodium-free pantry staple, and never use iodized table salt as it clouds the liquid)
Step-by-Step Instructions
Phase 1: Preparation & Sterilization
-
Prepare the Canner and Jars: Place the canning rack in the bottom of your pressure canner and add 2 to 3 inches of hot water (or the exact amount specified by your canner’s manufacturer). Wash your 7 pint jars in hot, soapy water, rinse thoroughly, and keep them hot in the simmering canner water or a low oven (200°F / 93°C) so they do not crack when filled with hot vegetables. Wash lids in warm soapy water and set aside.
-
Dice with Precision: Cut the onions, carrots, and celery into even ½-inch pieces. Uniform sizing is essential not only for even texture in your finished dishes, but also to ensure predictable heat penetration during pressure processing. Toss all three vegetables together in a large mixing bowl until evenly distributed.
Phase 2: Hot Pack Blanching
-
Blanch the Vegetables: Bring the 8 cups of water to a rolling boil over high heat in a large stockpot. Add the mixed diced vegetables to the boiling water. Return the pot to a boil and cook for 3 minutes over medium-high heat. This brief hot-pack blanching drives out trapped air from the vegetable tissues, prevents floating in the jars, and allows more mirepoix to fit into each pint.
-
Fill the Jars: Remove one hot jar at a time from the canner using a jar lifter. If using salt, add ½ teaspoon of canning salt to the bottom of the jar. Using a wide-mouth canning funnel and slotted spoon, pack the hot blanched vegetables into the jar, leaving 1 inch (2.5 cm) of headspace at the top.
-
Add Liquid and Debubble: Ladle the hot blanching liquid over the vegetables, maintaining the exact 1-inch headspace. Slide a non-metallic bubble remover or plastic chopstick around the inside perimeter of the jar to release trapped air pockets. Check the headspace again and top off with a splash of hot liquid if the level dropped.
Phase 3: Sealing & Pressure Processing
-
Wipe and Cap: Dip a clean paper towel or lint-free cloth into white vinegar and wipe the rim of each jar thoroughly to remove any residue that could compromise the seal. Center a flat canning lid on the jar and screw the metal band on until fingertip-tight—do not overtighten, as air must escape during processing.
-
Vent the Canner: Place the filled jars onto the rack inside the pressure canner. Lock the lid securely, leaving the weight/petcock off. Turn the burner to high heat until a steady, vigorous funnel of steam escapes from the vent pipe. Allow it to vent uninterrupted for a full 10 minutes to purge all trapped air from the chamber.
-
Process Under Pressure: Place the pressure regulator weight onto the vent pipe (or close the petcock). Adjust the burner down to medium or medium-high heat to bring the pressure up steadily:
-
Weighted-Gauge Canner: Process at 10 PSI (adjust to 15 PSI if you live above 1,000 feet / 305 meters elevation).
-
Dial-Gauge Canner: Process at 11 PSI (adjust to 12 PSI at 2,001–4,000 ft; 13 PSI at 4,001–6,000 ft; 14 PSI at 6,001–8,000 ft).
-
Once target pressure is reached, maintain a steady, gentle flame and process pint jars for 35 minutes (this processing time is governed by carrots, the densest low-acid vegetable in the mix). If pressure drops below the target at any point, bring it back up and restart the 35-minute timer from zero.
-
Phase 4: Cooling & Pantry Storage
-
Natural Depressurization: When the 35 minutes are complete, turn off the heat completely. Do not move the canner or attempt to force-cool it with wet towels or cold water. Let the canner depressurize naturally until the gauge reads zero and the safety lock drops (typically 30 to 45 minutes).
-
Cool and Check Seals: Wait an additional 10 minutes after removing the weight before unlatching the lid away from your face. Lift the jars straight up and place them on a thick towel-lined counter with 2 inches of space between each jar. Leave them undisturbed for 12 to 24 hours. Check seals by pressing the center of each lid—if it does not flex up and down, the vacuum seal is secure. Remove the metal bands, wipe the jars clean, label with the date, and store.
How to Use Your Canned Mirepoix
-
Quick Soups & Stews: Pour the entire jar—including the flavorful vegetable cooking liquid—directly into your pot along with broth, proteins, and herbs.
-
Sautéed Base for Sauces: Drain the liquid into a measuring cup (save it for cooking rice or grains!), pat the vegetables dry, and sauté them in 1 tablespoon of olive oil or butter over medium-high heat for 4 to 5 minutes until lightly caramelized before adding garlic, tomato paste, or wine.
-
Roast Pan Gravies: Scatter drained mirepoix under a roasting chicken or beef chuck roast to infuse the pan drippings with rich aromatic sweetness.
Nutrition Facts
Serving Size: ½ cup (approx. 120 g, drained) | Servings Per Pint Jar: ~3.5 (24.5 servings per batch)
| Nutrient | Amount Per Serving (With Salt) | Amount Per Serving (Unsalted) | % Daily Value* |
| Calories | 45 kcal | 45 kcal | 2% |
| Total Fat | 0.2 g | 0.2 g | 0% |
| Saturated Fat | 0 g | 0 g | 0% |
| Cholesterol | 0 mg | 0 mg | 0% |
| Sodium | 340 mg | 35 mg | 15% / 2% |
| Total Carbohydrate | 10.2 g | 10.2 g | 4% |
| Dietary Fiber | 2.1 g | 2.1 g | 8% |
| Total Sugars | 4.8 g | 4.8 g | — |
| Protein | 1.1 g | 1.1 g | 2% |
| Vitamin A | 310 mcg RAE | 310 mcg RAE | 34% |
| Vitamin C | 6.5 mg | 6.5 mg | 7% |
| Potassium | 265 mg | 265 mg | 6% |
