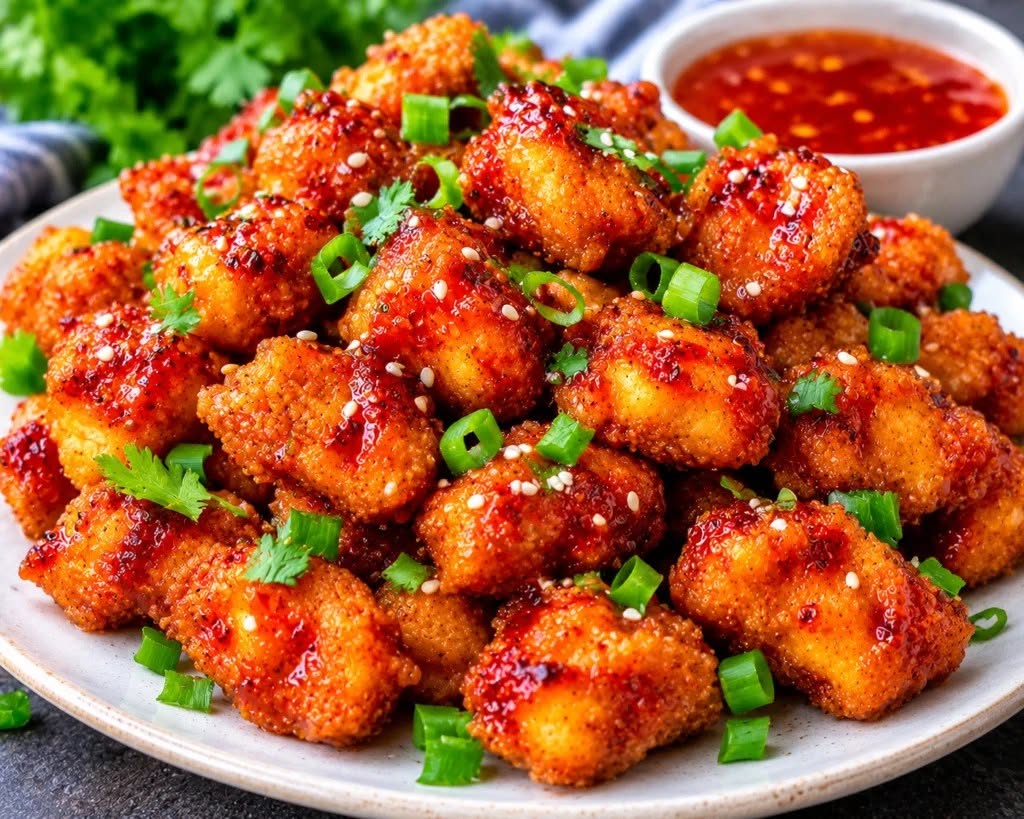
| Prep Time | 20 minutes |
| Marinating Time | 30 minutes |
| Cook Time | 15 minutes |
| Total Time | 1 hour 5 minutes |
| Servings | 4 servings |
| Cooking Intensity / Difficulty | Medium (Requires oil temperature management) |
| Heat / Spice Intensity | Mild-Medium (Customizable; 2 out of 5 on the spice scale) |
Understanding the Intensities
-
Cooking Intensity (Medium): While the ingredient list is straightforward and the prep is simple, deep-frying requires active attention. You will need to monitor your oil temperature closely—keeping it steadily between 350°F and 365°F (175°C–185°C)—and work in batches so you do not overcrowd the pan.
-
Flavor & Spice Intensity (Mild-Medium): The glaze leans heavily into sweet, tangy, and garlicky notes with a gentle, warming back-heat from red chili flakes and sweet chili sauce. It is mild enough for kids and spice-sensitive eaters, yet vibrant enough for adults. If you prefer a fiery kick, you can easily dial up the intensity by adding extra crushed red pepper flakes, fresh diced Thai bird’s eye chilies, or a drizzle of sriracha to the glaze.
Ingredients
For the Chicken & Marinade
-
1.5 lbs (680 g) boneless, skinless chicken breasts (or boneless thighs for extra richness), cut into uniform 1-inch bite-sized cubes
-
1/2 cup (120 ml) buttermilk (or 1/2 cup whole milk mixed with 1/2 tablespoon lemon juice, rested for 5 minutes)
-
1 large egg, lightly beaten
-
1 teaspoon kosher salt
-
1/2 teaspoon freshly cracked black pepper
-
1 teaspoon garlic powder
-
1/2 teaspoon smoked paprika
For the Crispy Dredge
-
1 cup (125 g) all-purpose flour
-
1/2 cup (60 g) cornstarch
-
1 teaspoon baking powder (creates tiny air pockets for extra crunch)
-
1 teaspoon kosher salt
-
1/2 teaspoon onion powder
-
1/2 teaspoon white pepper (or black pepper)
-
Vegetable, canola, or peanut oil, for frying (about 3 to 4 cups, depending on your pot size)
For the Sticky Sweet Chili Glaze
-
1/2 cup (120 ml) Thai sweet chili sauce (store-bought or homemade)
-
2 tablespoons honey (adds deep gloss and viscosity)
-
1 tablespoon low-sodium soy sauce (for savory umami balance)
-
1 tablespoon rice vinegar (cuts through the sweetness with bright acidity)
-
2 cloves garlic, finely minced or grated
-
1 teaspoon fresh ginger, finely grated
-
1/4 teaspoon crushed red pepper flakes (optional, for extra heat)
-
1 teaspoon toasted sesame oil (stirred in at the end for aroma)
For Garnish
-
2 green onions (scallions), thinly sliced on a bias
-
1 tablespoon toasted white or black sesame seeds
Step-by-Step Instructions
1. Cut and Marinate the Chicken
Pat the chicken breasts completely dry with paper towels, then slice them into uniform 1-inch pieces so they cook at the exact same rate. In a medium mixing bowl, whisk together the buttermilk, beaten egg, kosher salt, black pepper, garlic powder, and smoked paprika. Add the cubed chicken, tossing thoroughly until every piece is submerged. Cover the bowl with plastic wrap and refrigerate for at least 30 minutes (or up to 4 hours). Do not skip this step—the lactic acid in the buttermilk gently breaks down proteins, ensuring tender meat.
2. Prepare the Dredging Station
In a wide, shallow dish or a large rimmed baking sheet, whisk together the all-purpose flour, cornstarch, baking powder, kosher salt, onion powder, and white pepper. Pro tip: Drizzle 1 to 2 tablespoons of the liquid buttermilk marinade directly into the dry flour mixture and rub it together with your fingertips. This creates tiny, craggy flour clumps that fry up into extra-crispy, restaurant-style ridges on the chicken.
3. Coat the Chicken
Remove the chicken from the refrigerator. Working in small handfuls, lift the chicken pieces out of the marinade, letting the excess liquid drip back into the bowl, and drop them into the flour mixture. Toss and press the dry coating firmly onto each cube so it adheres well. Transfer the coated pieces to a wire rack set over a baking sheet and let them rest for 5 to 10 minutes. Resting allows the starch to hydrate slightly, preventing the crust from falling off in the hot oil.
4. Heat the Oil & Fry in Batches
Pour about 2 inches of neutral frying oil into a heavy-bottomed Dutch oven, deep skillet, or wok. Heat over medium-high heat until the oil reaches 350°F (175°C) on an instant-read or candy thermometer. Carefully lower one-third of the chicken pieces into the hot oil one by one so they do not stick together. Fry for 3 to 4 minutes, turning occasionally with a spider strainer or slotted spoon, until the exterior is deep golden brown and the internal temperature reaches 165°F (74°C). Transfer the cooked chicken to a clean wire cooling rack to drain—avoid paper towels, as trapped steam will soften the bottom crust. Bring the oil back up to 350°F between batches and repeat with the remaining chicken.
5. Simmer the Sweet Chili Glaze
While the final batch of chicken drains, place a large wok or wide sauté pan over medium-low heat. Add the Thai sweet chili sauce, honey, soy sauce, rice vinegar, minced garlic, grated ginger, and crushed red pepper flakes. Stir gently and bring to a light simmer for 2 to 3 minutes until the garlic smells fragrant and the sauce thickens enough to coat the back of a spoon. Remove the pan from the heat and stir in the toasted sesame oil.
6. Toss and Serve Immediately
Add the hot, crispy popcorn chicken directly into the warm glaze in the pan. Using a rubber spatula, gently fold and toss the chicken for 15 to 20 seconds—just until every piece is glistening and evenly coated. Do not let the chicken sit in the pan over heat, or the coating will lose its crunch. Transfer immediately to a serving platter, scatter toasted sesame seeds and sliced green onions over the top, and serve right away.
Serving Suggestions, Storage & Reheating
How to Serve It
-
As a Main Dish: Serve over a bed of steamed jasmine rice, coconut rice, or cauliflower rice alongside stir-fried broccoli, snap peas, or bok choy to soak up the extra sweet chili glaze.
-
As an Appetizer: Pile the chicken onto a large platter with toothpicks and a side of cool ranch, spicy mayo, or extra sweet chili sauce for dipping.
-
In Wraps or Bowls: Tuck the glazed chicken into warm flour tortillas with shredded cabbage and cilantro for fusion tacos, or layer it into a grain bowl with diced avocado, cucumber, and pickled carrots.
Storage & Reheating Tips
-
Storing Leftovers: Store any leftover chicken in an airtight container in the refrigerator for up to 3 days. If you anticipate leftovers, keep a portion of the fried chicken unglazed and store the sauce separately—this keeps the crust significantly fresher.
-
Reheating for Maximum Crunch: Avoid the microwave, which will turn the coating rubbery. Instead, reheat leftovers in an air fryer at 375°F (190°C) for 4 to 5 minutes, or bake on a wire rack in a 400°F (205°C) oven for 8 to 10 minutes until hot and re-crisped.
Nutrition Information
Nutritional values are estimates calculated per serving (1/4 of the recipe), assuming standard oil absorption during deep-frying.
| Nutrient | Amount per Serving | % Daily Value* |
| Calories | 510 kcal | 26% |
| Total Fat | 16 g | 21% |
| Saturated Fat | 2.5 g | 13% |
| Cholesterol | 145 mg | 48% |
| Sodium | 1,180 mg | 51% |
| Total Carbohydrates | 52 g | 19% |
| Dietary Fiber | 1.5 g | 5% |
| Total Sugars | 24 g | — |
| Protein | 39 g | 78% |
