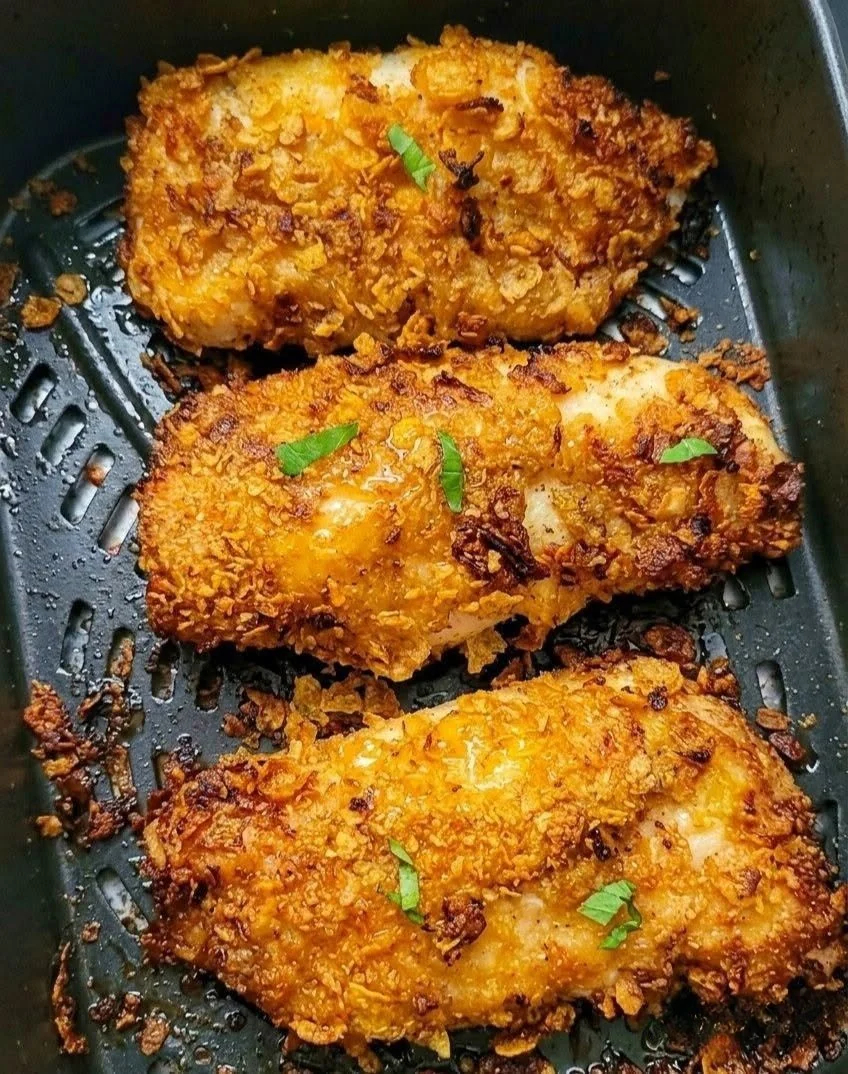
-
Prep Time: 15 minutes
-
Marinating Time: 15 to 30 minutes (optional, but highly recommended)
-
Cook Time: 12 to 14 minutes
-
Total Time: 40 to 45 minutes
-
Yield: 4 generous servings
-
Difficulty Level: Easy / Beginner-Friendly
-
Cooking Method: Rapid Air Circulation (Air Frying)
Equipment Needed
-
Air Fryer: Any basket or oven-style air fryer (4-quart capacity or larger works best).
-
3 Shallow Bowls / Pie Dishes: For setting up an efficient, mess-free dredging station.
-
Rolling Pin & Sealable Plastic Bag: For crushing the cornflakes uniformly without making a mess.
-
Tongs: Keeps your hands clean during the breading process.
-
Meat Thermometer: The key to ensuring perfectly cooked, safe, and juicy chicken without overcooking.
Key Ingredients & Substitutions
1. The Chicken
-
1.5 lbs (approx. 680g) Boneless, Skinless Chicken Breast: Cut into uniform, bite-sized strips or tenders. Uniformity ensures even cooking so no piece dries out.
-
Alternative: Boneless, skinless chicken thighs can be used for extra richness and natural moisture. Add 2 minutes to the total air-frying time if using thighs.
2. The Buttermilk Marinade & Binder
-
1/2 cup Low-Fat Buttermilk: The natural lactic acid gently tenderizes the chicken fibers, keeping the meat incredibly succulent.
-
1 large Egg: Beaten into the buttermilk to create a strong binding liquid that holds the cornflake coating tightly to the chicken.
-
Alternative: If you do not have buttermilk, combine 1/2 cup of milk with 1/2 tablespoon of lemon juice or white vinegar and let it sit for 5 minutes until slightly curdled.
3. The Flour Layer
-
1/2 cup All-Purpose Flour: Creates a dry barrier on the raw chicken so the liquid mixture can cling properly.
-
1/2 teaspoon Fine Sea Salt & 1/4 teaspoon Black Pepper: Essential for seasoning every individual layer.
-
Alternative: Almond flour or a 1-to-1 Gluten-Free Baking Flour works seamlessly for gluten-conscious meal preppers.
4. The Cornflake Coating & Spice Blend
-
3 cups Unsweetened Cornflakes: Yields about 1.5 cups of crushed cornflake crumbs.
-
1 teaspoon Garlic Powder: Adds a savory, aromatic depth.
-
1 teaspoon Onion Powder: Complements the garlic with subtle sweetness.
-
1 teaspoon Smoked Paprika: Gives a gorgeous golden-red color and mild smokiness.
-
1/2 teaspoon Dried Oregano or Italian Seasoning: For subtle herbal warmth.
-
1/4 teaspoon Cayenne Pepper (Optional): Turn up the heat if you prefer a spicy kick!
-
Non-Stick Olive Oil or Avocado Oil Spray: Crucial for helping the cornflakes brown evenly and achieve max crunch.
Step-by-Step Instructions
Step 1: Prep & Tenderize the Chicken
-
Pat the chicken breasts thoroughly dry with paper towels. Dry meat holds onto flour far better than wet meat.
-
Slice the chicken into uniform strips roughly 1 inch wide and 3 to 4 inches long.
-
In a bowl, whisk together the buttermilk, beaten egg, 1/2 teaspoon of garlic powder, and a pinch of salt. Add the chicken tenders, ensuring every piece is completely submerged.
-
Cover and let marinate in the refrigerator for 15 to 30 minutes while you set up the remaining stations.
Step 2: Prepare the Dredging Station
Set up three shallow dishes in a line from left to right to build an efficient assembly line:
-
Bowl 1 (Dry Base): Whisk together the all-purpose flour, sea salt, and black pepper.
-
Bowl 2 (Wet Binder): Your marinated chicken in the buttermilk-egg mixture.
-
Bowl 3 (Crispy Outer Layer): Place the cornflakes inside a large ziplock bag. Seal tightly, squeezing out excess air, and roll over it with a rolling pin until coarse crumbs form. Avoid crushing them into a fine dust—small fragments create the best textured crunch. Pour the crushed flakes into your third bowl and toss with the smoked paprika, remaining garlic powder, onion powder, oregano, and optional cayenne pepper.
Step 3: Bread the Chicken (The Dry-Hand / Wet-Hand Method)
-
Using your left hand (wet hand), lift a strip of chicken from the buttermilk marinade and let any excess liquid drip off.
-
Drop it into Bowl 1 (Flour). Use your right hand (dry hand) to coat the chicken completely in flour, shaking off any excess.
-
Dip the floured strip back into Bowl 2 (Buttermilk Mixture) to re-wet the exterior.
-
Transfer the strip into Bowl 3 (Cornflake Mix). Use your dry hand to press the cornflakes firmly into all sides of the chicken piece until fully covered in a thick, crunchy coat.
-
Place the coated chicken tender onto a parchment-lined baking sheet or clean plate. Repeat with all remaining pieces.
Step 4: Air Fry to Golden Perfection
-
Preheat: Set your air fryer to 390°F (200°C) and let it preheat for 3 to 4 minutes. Preheating guarantees an instant sear when the chicken hits the basket.
-
Arrange: Lightly coat the bottom of the air fryer basket with avocado or olive oil spray. Place the chicken tenders in a single layer, leaving at least 1/2 inch of space between each piece. Do not overcrowd the basket; air circulation is required for crunch. Work in two batches if necessary.
-
Oil mist: Lightly mist the tops of the cornflake-coated chicken with high-smoke-point oil spray. This prevents dry pockets of flour and boosts the golden color.
-
Air Fry: Cook at 390°F (200°C) for 6 minutes. Open the basket, gently flip each piece over using tongs, spray the top lightly once more, and cook for an additional 6 to 8 minutes.
-
Verify: The chicken is done when the outer coating is deep golden brown and the internal temperature reaches 165°F (74°C) on a instant-read digital meat thermometer.
Step 5: Rest & Serve
Transfer the chicken strips to a wire rack set over a baking sheet and let them rest for 3 to 5 minutes before serving. Resting prevents steam from trapping underneath, preserving that maximum crunch level!
Pro-Tips for Maximum Success
-
Don’t Over-Crush the Cornflakes: Aim for a mix of fine crumbs and pea-sized cornflake pieces. The variance in size creates micro-crevices that trap air and yield superior crunch.
-
Use High-Smoke-Point Oil Spray: Avoid non-stick aerosol cooking sprays containing propellant additives, which can degrade air fryer basket coatings over time. Opt for refillable misting bottles filled with avocado, canola, or olive oil.
-
Keep Batch Size Controlled: If pieces touch, moisture gets trapped between them, resulting in soggy spots. Give them breathing room!
-
Reheating for Leftovers: Never microwave breaded chicken if you want to keep the texture crisp. Re-crisp leftover tenders in the air fryer at 375°F (190°C) for 3 to 4 minutes.
Dipping Sauce Pairings
-
Honey Mustard Drizzle: 3 tbsp Mayonnaise, 2 tbsp Yellow or Dijon Mustard, 1.5 tbsp Honey, 1 tsp Lemon juice.
-
Spicy Creamy Mayo: 1/4 cup Greek Yogurt or Mayonnaise, 1 tbsp Sriracha, 1/2 tsp Honey, pinch of garlic powder.
-
Classic Garlic Herb Ranch: Light buttermilk ranch mixed with fresh dill and cracked black pepper.
Nutritional Information
(Calculated per serving; recipe yields 4 servings. Values are estimates based on standard ingredients.)
| Nutrient | Amount Per Serving |
| Calories | 340 kcal |
| Protein | 42 g |
| Total Carbohydrates | 26 g |
| Dietary Fiber | 1.5 g |
| Sugars | 3 g |
| Total Fat | 6 g |
| Saturated Fat | 1.5 g |
| Cholesterol | 110 mg |
| Sodium | 480 mg |
| Potassium | 650 mg |
