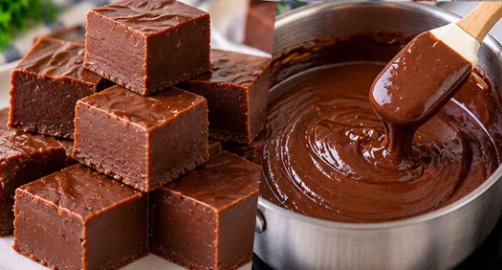
| Prep Time | 10 minutes |
| Cook Time | 10 minutes |
| Chilling Time | 2 hours |
| Total Time | 2 hours 20 minutes |
| Yield | 36 bite-sized squares (8×8 inch pan) |
| Shelf Life | 2 weeks (room temp), 1 month (refrigerated), 3 months (frozen) |
Ingredients List
To achieve optimal texture and flavor, use high-quality chocolate chips or finely chopped baking chocolate (around 60% cacao content balances sweetness and cocoa depth).
-
3 cups (500g) semi-sweet chocolate chips (or 60% dark chocolate, finely chopped)
-
1 can (14 oz / 397g) sweetened condensed milk (full fat)
-
1/4 cup (56g) unsalted butter, cut into small cubes
-
2 tbsp (30ml) heavy whipping cream
-
1 tsp pure vanilla extract
-
1/4 tsp fine sea salt or kosher salt
-
Flaky sea salt (optional, for garnish)
Step-by-Step Instructions
Step 1: Prepare the Pan
Line an 8×8-inch square baking dish with parchment paper, leaving an overhang on two opposite sides to serve as a sling for easy lifting later. Lightly grease the parchment paper with butter or non-stick cooking spray.
Step 2: Combine Base Ingredients
In a heavy-bottomed saucepan over low heat, combine the chocolate chips, sweetened condensed milk, cubed unsalted butter, and heavy whipping cream.
Heat Intensity Note: Maintain low, gentle heat throughout the melting process. Direct high heat will scorch the chocolate and cause the cocoa butter to separate, resulting in a greasy texture.
Step 3: Melt and Emulsify
Stir continuously with a heat-proof silicone spatula until the mixture is about 80% melted. Remove the pan from the heat source and let the residual heat finish melting the chocolate. Continue stirring vigorously until the mixture becomes smooth, glossy, and completely uniform in texture.
Step 4: Flavor Enhancements
Fold in the pure vanilla extract and fine sea salt. Stir for an additional 30 seconds to distribute evenly.
Step 5: Pour and Smooth
Immediately scrape the hot fudge mixture into the prepared 8×8-inch pan. Use an offset spatula or the back of a spoon to smooth the top into an even layer. If using flaky sea salt, sprinkle it evenly across the surface while the fudge is still warm so it adheres properly.
Step 6: Chill and Set
Transfer the pan to the refrigerator uncovered and chill for at least 2 hours (or overnight) until completely firm to the touch.
Step 7: Slice and Serve
Using the parchment paper handles, lift the set block of fudge out of the pan and place it onto a clean cutting board. Run a sharp chef’s knife under hot water, wipe it completely dry, and slice the fudge into a 6×6 grid yielding 36 equal squares. Wipe the knife clean between cuts for smooth edges.
Chef’s Pro Tips for Success
-
Avoid Water Contact: Chocolate is extremely sensitive to moisture. Ensure all utensils, bowls, and spatulas are completely dry before starting. Even a single drop of water can cause the chocolate to seize into a grainy paste.
-
Double Boiler Option: If your stovetop burners run hot even on the lowest setting, place the ingredients in a heat-proof glass bowl set over a pot of simmering water (a double boiler setup). Ensure the bottom of the bowl does not touch the water.
-
Storage Best Practices: Store the sliced fudge in an airtight container layered with parchment paper. Keep at cool room temperature for up to two weeks or in the refrigerator for up to one month. For long-term storage, freeze wrapped tightly for up to 3 months; thaw overnight in the fridge before serving.
Comprehensive Nutrition Facts
Nutritional values are calculated per single serving (1 square, assuming 36 total pieces).
| Nutrient | Amount Per Serving | % Daily Value* |
| Calories | 125 kcal | — |
| Total Fat | 6.5 g | 8% |
| Saturated Fat | 4.0 g | 20% |
| Trans Fat | 0.0 g | — |
| Cholesterol | 10 mg | 3% |
| Sodium | 35 mg | 2% |
| Total Carbohydrate | 16.0 g | 6% |
| Dietary Fiber | 1.0 g | 4% |
| Total Sugars | 14.5 g | — |
| Added Sugars | 13.0 g | 26% |
| Protein | 1.8 g | 4% |
| Vitamin D | 0.2 mcg | 1% |
| Calcium | 45 mg | 4% |
| Iron | 0.8 mg | 4% |
| Potassium | 85 mg | 2% |
