-
Prep Time: 5 Minutes
-
Cook Time: 10 Minutes
-
Total Time: 15 Minutes
-
Yield: Approx. 1.5 Cups (12 Servings / 2 tbsp per serving)
-
Recipe Intensity Level: Low (Beginner-Friendly)
-
Spiciness Level / Heat Intensity: Medium (Easily Adjustable)
-
Dietary Profile: 100% Vegan, Gluten-Free Option, Nut-Free, Oil-Free
Key Ingredients & Flavor Profile
To achieve the iconic sweet-and-sour depth with a warm kick of heat, each ingredient plays a distinct role:
-
Water (½ cup / 120 ml): The liquid base that allows the sugars and starches to dissolve evenly.
-
Unfiltered Rice Vinegar or Apple Cider Vinegar (½ cup / 120 ml): Provides the essential tart brightness that balances the sweetness. Rice vinegar offers a smoother finish, while apple cider vinegar adds a subtle fruity undertone.
-
Pure Maple Syrup or Organic Cane Sugar (½ cup / 100 g – 120 g): Delivers the deep, clean sweetness required for a classic Thai-style glaze. Using maple syrup or unrefined organic cane sugar keeps the recipe 100% vegan.
-
Fresh Garlic (3 cloves, minced finely or crushed): Adds savory aromatics and essential depth to balance the acidity.
-
Red Chili Flakes or Fresh Red Thai Chilis (1 to 2 tablespoons): The primary source of heat. Red pepper flakes offer consistent, moderate warmth, while finely chopped fresh red bird’s eye chilis deliver a fresh, vibrant fiery kick.
-
Soy Sauce or Tamari (1 tablespoon): Adds umami and a hint of saltiness. Use tamari or coconut aminos to keep the recipe strictly gluten-free.
-
Tomato Paste or Sriracha (1 teaspoon): Adds a touch of rich color and subtle tangy warmth.
-
Cornstarch or Arrowroot Powder (1½ tablespoons): The crucial thickening agent that creates the signature silky, glossy glaze texture.
-
Cold Water for Slurry (2 tablespoons): Used to dissolve the starch before adding it to hot liquid, preventing lumps.
Step-by-Step Cooking Instructions
Step 1: Prepare the Flavor Base
In a small non-reactive saucepan, combine the water, rice vinegar, maple syrup (or cane sugar), minced garlic, red chili flakes (or fresh chilis), soy sauce (or tamari), and tomato paste. Stir well to mix the ingredients thoroughly.
Step 2: Heat and Simmer (Intensity: Medium Heat)
Place the saucepan over medium heat. Bring the liquid mixture to a gentle boil, stirring occasionally to ensure the sugar fully dissolves. Once boiling, turn down the heat to low intensity and allow the mixture to simmer gently for about 3 to 4 minutes. This allows the garlic and chilis to infuse their flavors into the liquid base.
Step 3: Prepare the Thickening Slurry
While the sauce is simmering, prepare your thickening slurry. In a small bowl or cup, combine 1½ tablespoons of cornstarch with 2 tablespoons of cold water. Whisk briskly with a fork or small whisk until the starch is fully dissolved and completely smooth with no remaining powder or clumps.
Note: Never add dry starch directly to a hot boiling pot, as it will instantly clump together.
Step 4: Thicken the Sauce (Intensity: Medium-Low Heat)
Lower the saucepan heat to medium-low intensity. Slowly pour the cold cornstarch slurry into the simmering sauce while whisking continuously. Keep whisking steadily as the liquid heats up.
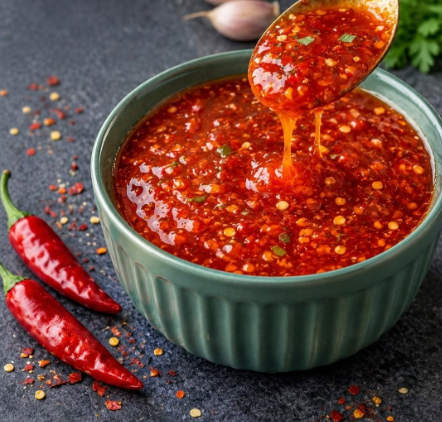
Within 1 to 2 minutes, you will notice the translucent liquid transform into a glossy, thick, rich red sauce that clings lightly to the back of a spoon.
Step 5: Final Simmer and Cooling
Allow the thickened sauce to simmer very gently on low heat for an additional 60 seconds to ensure the starch is cooked through. Remove the saucepan from the heat completely.
The sauce will appear slightly runnier while boiling hot, but it will continue to thicken to its ideal, dippable consistency as it cools to room temperature.
Storage & Shelf Life Instructions
-
Cooling: Allow the sweet chili sauce to cool down completely at room temperature before transferring it.
-
Refrigeration: Store the cooled sauce in a clean, airtight glass jar or container in the refrigerator. It remains fresh and vibrant for up to 3 to 4 weeks.
-
Freezing: You can freeze this sauce in small silicone mold portions or airtight freezer-safe containers for up to 3 months. Thaw overnight in the fridge and stir well before serving.
-
Reheating: If the sauce becomes slightly firm after chilling in the fridge, simply leave it at room temperature for 10 minutes or warm it gently with a splash of water over low heat.
Chef’s Tips & Recipe Variations
-
Adjusting the Heat Level:
-
Mild: Reduce the chili flakes to 1 teaspoon.
-
Extra Spicy: Add 1 finely diced fresh Thai bird’s eye chili alongside 1 tablespoon of red chili flakes and a dash of cayenne pepper.
-
-
Gluten-Free Customization:
-
Replace traditional soy sauce with certified gluten-free tamari or coconut aminos.
-
-
Refined Sugar-Free Option:
-
Use pure maple syrup or agave nectar instead of granulated cane sugar.
-
Suggested Pairing Ideas
This vegan sweet chili sauce is extraordinarily versatile and complements a wide variety of plant-based dishes:
-
Crispy Appetizers: Perfect dipping sauce for vegetable spring rolls, vegan dumplings, samosas, or crispy onion rings.
-
Tofu & Tempeh Glaze: Toss pan-seared or air-fried tofu cubes in the sauce during the final 2 minutes of cooking for a glossy sweet chili glaze.
-
Roasted Vegetables: Drizzle over roasted cauliflower, Brussels sprouts, or sweet potato wedges before serving.
-
Grain Bowls & Noodles: Stir a couple of tablespoons into rice noodle stir-fries, Buddha bowls, or peanut noodles for a pop of sweet heat.
Comprehensive Nutritional Breakdown
(Calculated per serving based on 12 total servings / 2 tablespoons per serving)
| Nutrient | Amount Per Serving | % Daily Value* |
| Calories | 45 kcal | — |
| Total Fat | 0.1 g | 0% |
| – Saturated Fat | 0.0 g | 0% |
| – Trans Fat | 0.0 g | — |
| Cholesterol | 0 mg | 0% |
| Sodium | 120 mg | 5% |
| Total Carbohydrates | 11 g | 4% |
| – Dietary Fiber | 0.3 g | 1% |
| – Total Sugars | 8.5 g | — |
| – Added Sugars | 8.0 g | 16% |
| Protein | 0.3 g | 1% |
| Vitamin D | 0.0 mcg | 0% |
| Calcium | 12 mg | 1% |
| Iron | 0.2 mg | 1% |
| Potassium | 35 mg | 1% |
