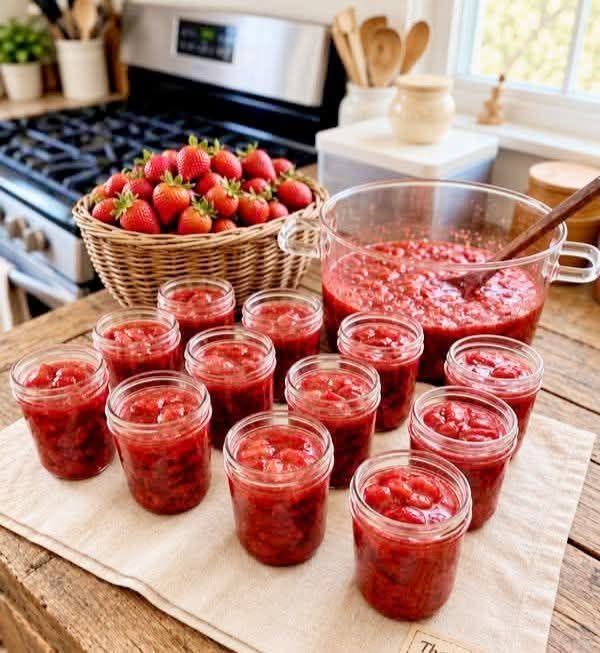
-
Prep Time: 20 minutes
-
Maceration Time: 30 minutes (optional, but highly recommended)
-
Cook Time: 20 to 25 minutes
-
Total Time: ~1 hour 15 minutes
-
Yield: Approximately 4 half-pint (8 oz / 250 ml) jars
Equipment Needed
-
Heavy-Bottomed Pot or Dutch Oven: A wide pot allows moisture to evaporate faster, resulting in a quicker cook time and brighter flavor.
-
Potato Masher or Pastry Cutter: For crushing the fruit to your desired texture.
-
Digital Candy Thermometer or Small Plates: To test the jam set point ($220^\circ\text{F} / 104^\circ\text{C}$).
-
Canning Jars with Lids and Bands: Four 8-ounce glass mason jars.
-
Wooden Spoon or Heat-Resistant Silicone Spatula: For continuous stirring.
-
Ladle & Jar Funnel: For clean transfer into jars.
Ingredients
-
Fresh Strawberries: $2\text{ lbs } (900\text{g})$ ripe, firm, fresh strawberries (washed, hulled, and halved)
-
Granulated White Sugar: $3\text{ cups } (600\text{g})$
-
Fresh Lemon Juice: $2\text{ tbsp } (30\text{ml})$ (freshly squeezed)
-
Lemon Zest: $1\text{ tsp}$ (optional, adds a delightful aromatic brightness)
-
Unsalted Butter: $1/2\text{ tsp}$ (optional, helps reduce foaming during boiling)
Pro Tip on Pectin: Strawberries are naturally low in pectin (the natural setting agent in fruits). Adding fresh lemon juice not only balances the sweetness with acidity but also provides the natural acid needed to activate the strawberries’ existing pectin.
Step-by-Step Instructions
Step 1: Prep & Macerate the Berries
-
Wash the strawberries thoroughly under cold running water and drain well.
-
Hull the strawberries (remove the green leafy tops and tough white cores) and cut them into halves or quarters depending on size.
-
In a large bowl, combine the strawberries, granulated sugar, fresh lemon juice, and optional lemon zest.
-
Stir well to coat all the fruit. Let the mixture sit at room temperature for 30 minutes. Macerating draws out the juice from the strawberries, dissolves the sugar, and helps the berries retain their vibrant red color and texture during cooking.
Step 2: Chill the Test Plates
-
Before starting to cook, place 2 or 3 small ceramic saucers into the freezer. You will use these later to test if the jam has set.
Step 3: Cook and Reduce
-
Transfer the macerated strawberry and sugar mixture into a heavy-bottomed pot. Add the $1/2\text{ tsp}$ of unsalted butter if using.
-
Heat the pot over medium-low heat, stirring continuously until the sugar completely dissolves.
-
Use a potato masher to gently crush the berries to your preferred consistency—leave large chunks for a rustic texture, or mash thoroughly for a smooth spread.
-
Increase the heat to medium-high and bring the mixture to a full rolling boil (a boil that cannot be stirred down).
-
Reduce heat slightly to maintain a active simmer/boil. Stir frequently, scraping the bottom and sides of the pot to prevent scorching.
-
As the mixture boils, foam will rise to the surface. Skim off excess foam with a spoon if desired.
Step 4: Test for the Setting Point
-
Cook for 15 to 25 minutes, stirring continuously as the jam thickens and darkens.
-
Temperature Test: If using a digital candy thermometer, the jam is set when it reaches $220^\circ\text{F} (104^\circ\text{C})$ at sea level.
-
Wrinkle / Freezer Plate Test: Remove the pot from the heat source. Place a small spoonful of hot jam onto one of the frozen plates. Let it sit for 1 minute, then gently push the edge of the jam with your finger. If the jam surface wrinkles and holds its shape, it is ready. If it runs liquidly, return the pot to the heat and boil for another 2–3 minutes before testing again.
Step 5: Jarring & Storage
-
Once the set point is reached, remove the pot from heat and let it rest for 5 minutes. Stir gently to evenly distribute the fruit pieces throughout the syrup.
-
Carefully ladle the hot jam into warm, clean glass jars, leaving $1/4\text{-inch}$ head space at the top.
-
Wipe the rims of the jars clean with a damp paper towel to ensure an airtight seal.
-
Screw on the lids and bands until fingertip-tight.
-
Storage Options:
-
Refrigerator Jam: Allow jars to cool to room temperature, then place them in the refrigerator. Use within 3 to 4 weeks.
-
Freezer Jam: Allow room for expansion ($1/2\text{-inch}$ headspace), let cool, and freeze for up to 1 year.
-
Canned Jam (Long-term shelf storage): Process filled jars in a boiling water bath canning kettle for 10 minutes. Store in a cool, dark place for up to 1 year.
-
Nutritional Facts
Serving Size: 1 Tablespoon (approx. 20g)
Servings Per Recipe: ~64 tablespoons
| Nutrients | Amount per Serving |
| Calories | 45 kcal |
| Total Fat | $0\text{g}$ |
| Saturated Fat | $0\text{g}$ |
| Trans Fat | $0\text{g}$ |
| Cholesterol | $0\text{mg}$ |
| Sodium | $0\text{mg}$ |
| Total Carbohydrates | $11\text{g}$ |
| Dietary Fiber | $0.4\text{g}$ |
| Sugars (Total) | $10\text{g}$ |
| Added Sugars | $9\text{g}$ |
| Protein | $0.1\text{g}$ |
| Vitamin C | $8\text{\% DV}$ |
