-
Prep Time: 45 minutes
-
Cook/Pre-brown Time: 25 minutes
-
Processing Time (Pint Jars): 75 minutes at pressure (depends on altitude)
-
Depressurizing & Cooling: 45–60 minutes
-
Total Time: ~3 hours 15 minutes
-
Yield: 6 Pint Jars (6 servings)
-
Difficulty & Intensity: Medium to High (Requires precise safety steps for pressure canning meat and low-acid foods)
Equipment Required
-
Heavy-duty pressure canner with pressure gauge or weighted gauge
-
6 pint-sized (16 oz) wide-mouth Mason canning jars with fresh lids and bands
-
Jar lifter, canning funnel, bubble remover tool, and lid wand
-
Heavy skillet for browning meat and sautéing vegetables
-
Large saucepan or kettle for hot water broth/liquid
Ingredients
Primary Layers
-
2.5 lbs (1.1 kg) Yukon Gold or Russet Potatoes, peeled and diced into 1/2-inch cubes
-
1.5 lbs (680g) Pork Sausage or Ground Meat (breakfast sausage, ground turkey, or beef)
-
1 large Red Bell Pepper, diced
-
1 large Green Bell Pepper, diced
-
1 large Yellow Onion, diced
-
6 large Eggs, lightly beaten
-
1 tbsp Olive Oil or Butter
Liquid & Seasoning Base
-
4 to 5 cups Warm Low-Sodium Chicken or Vegetable Broth (or hot water)
-
1 tsp Garlic Powder
-
1 tsp Smoked Paprika
-
1 tsp Salt (adjust to taste)
-
1/2 tsp Black Pepper
-
1/4 tsp Red Pepper Flakes (optional, for heat)
Intensity & Technical Safety Notes
Critical Food Safety Notice: Potatoes, sausage, peppers, onions, and eggs are low-acid foods. They must be processed using a pressure canner—water bath canning is strictly unsafe for these ingredients.
-
Target Pressure: 10 lbs (PSI) for weighted gauge / 11 lbs (PSI) for dial gauge (adjust to 12–15 PSI if living above 1,000 ft altitude).
-
Target Processing Duration: 75 minutes for pint jars.
-
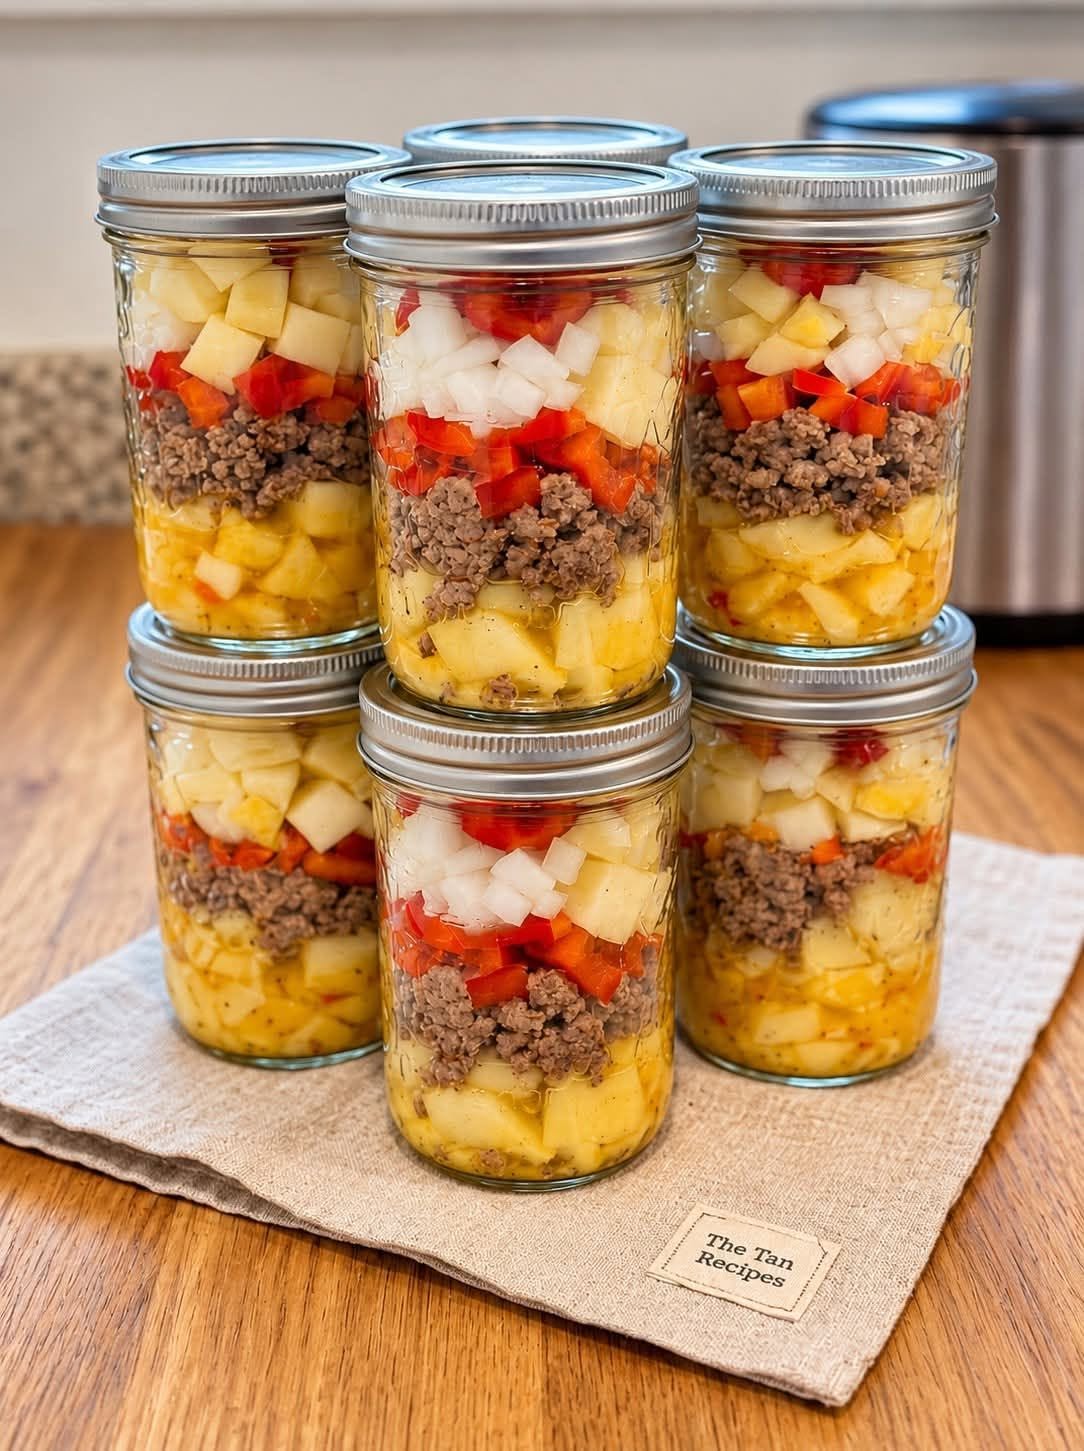
Packing Intensity: Pack ingredients firmly to achieve clean visual layers, but leave 1 inch of headspace at the top of each jar to allow proper expansion and heat circulation.
Step-by-Step Instructions
Step 1: Prepare the Jars & Canning Setup
-
Wash 6 pint jars, new lids, and screw bands in warm, soapy water. Rinse thoroughly.
-
Fill your pressure canner with 2 to 3 inches of hot water and place it on your stove over low heat to keep warm.
-
Keep jars warm in a pot of hot water or in a low oven (180°F / 82°C) to prevent thermal shock when filling with hot ingredients.
Step 2: Par-Cook the Meat & Vegetables
-
Place a large skillet over medium-high heat. Add the sausage or ground meat, breaking it up with a spoon. Cook until thoroughly browned and no longer pink (about 8–10 minutes). Drain excess grease completely and transfer the meat to a clean bowl.
-
In the same skillet, heat 1 tablespoon of olive oil over medium heat. Add the diced yellow onion, red bell pepper, and green bell pepper. Sauté for 5 to 6 minutes until slightly softened but still holding shape. Remove from heat.
-
Bring the diced potatoes to a quick boil in a saucepan of water for 3 to 5 minutes (par-boiling prevents starch breakdown during pressure processing). Drain well.
Step 3: Layer the Jars
Working with one warm jar at a time:
-
Layer 1 (Potatoes): Add about 1/2 cup of par-boiled diced potatoes to the bottom of the jar.
-
Layer 2 (Sausage): Add about 1/3 cup of browned sausage or ground meat over the potatoes.
-
Layer 3 (Peppers & Onions): Add 1/3 cup of the sautéed bell pepper and onion mixture.
-
Layer 4 (Egg): Pour 1 lightly beaten egg into each jar, allowing it to trickle down into the crevices.
-
Layer 5 (Top Layer): Repeat a thin top layer of sausage or peppers if room allows.
Step 4: Add Hot Liquid & Adjust Headspace
-
Combine broth, garlic powder, smoked paprika, salt, black pepper, and optional red pepper flakes in a saucepan over medium heat; bring to a gentle simmer.
-
Pour hot broth into each layered jar using a funnel, leaving 1 inch of headspace at the top.
-
Gently slide a non-metallic bubble remover down the sides of the jar to release trapped air bubbles. Re-check headspace and add hot liquid if needed.
Step 5: Seal and Process in Pressure Canner
-
Wipe the rim of each jar clean with a clean paper towel dampened with warm water or vinegar to remove any oil or food particles.
-
Place a flat lid on top and screw the band down until fingertip-tight.
-
Load the filled jars into the pressure canner containing 2–3 inches of hot water.
-
Lock the canner lid into place. Turn heat to high and allow steam to vent freely from the vent pipe for 10 full minutes before placing the pressure regulator or weight on the vent.
-
Bring the canner to processing pressure (10–11 PSI based on gauge type and altitude).
-
Once correct pressure is reached, process pint jars continuously for 75 minutes. Adjust burner heat to maintain steady pressure throughout.
Step 6: Depressurize, Cool, and Store
-
After 75 minutes, turn off the burner. Let the canner cool down naturally until the pressure drops completely to zero. Do not force-cool the canner.
-
Once fully depressurized, carefully remove the lid away from your face.
-
Use a jar lifter to transfer jars onto a towel-lined countertop, leaving 1 inch of space between jars.
-
Allow jars to sit undisturbed for 12 to 24 hours. You will hear satisfying “pops” as the vacuum seals form.
-
Check seals after 24 hours by pressing the center of each lid (it should not flex up or down). Label with the date and store in a cool, dark, dry place.
How to Serve
To serve, simply unseal a jar and empty the contents into a hot skillet for 4–5 minutes until sizzling and thoroughly heated, or microwave in a glass dish for 90–120 seconds. Top with shredded cheddar cheese, sliced avocado, or hot sauce!
Nutritional Information
(Estimated values per 1 Pint / 16 oz Jar serving)
